
In this blog, we am going to install OpenVAS security assistance from the screech. Source Files are download from github repository. Version we are going to download from source is 21.04. Which is the latest stable version we can use at the moment.
Prerequisites
Server Spec:
Packages
- Enable the Epel repo
yum install https://dl.fedoraproject.org/pub/epel/epel-release-latest-8.noarch.rpm
- Enable "codeready-builder-for-rhel-8-x86_64-rpms"
subscription-manager repos --enable codeready-builder-for-rhel-8-x86_64-rpms

Install below packages
yum install cmake glib2-devel zlib-devel gnutls-devel libuuid-devel libssh-devel libxml2-devel wget vim rsync libgcrypt-devel openldap-devel popt-devel redis libical-devel openssl-devel hiredis-devel radcli-devel bzip2-devel python3-devel libpq-devel texinfo xmltoman nmap sshpass socat mingw32-gcc ncurses-devel libunistring-devel xz-devel gpgme-devel libksba-devel doxygen libpcap-devel python3-polib libmicrohttpd-devel gnutls-utils libnet-devel libffi-devel gcc rsync make cpan bison gcc-c++
- Download Heimdal from github repo
wget https://github.com/heimdal/heimdal/releases/download/heimdal-7.7.0/heimdal-7.7.0.tar.gz -P /tmp/
- Extract and install Heimdal
tar xzf heimdal-7.7.0.tar.gz
cd heimdal-7.7.0
./configure --enable-opt=no --disable-otp --prefix=/opt/heimdal
make
make install
cd ~
ln -s /opt/heimdal/include/ /opt/heimdal/include/heimdal
echo "/opt/heimdal/lib" > /etc/ld.so.conf.d/heimdal-gssapi.conf
ldconfig
- Next, create a symbolic of the
/usr/lib64/libtspi.so.1to/usr/lib64/libtspi.so. This is needs to be done to fix the error, /usr/bin/ld: cannot find -ltspi, encountered while compiling OpenVAS SMB.
ln -s /usr/lib64/libtspi.so.1 /usr/lib64/libtspi.so
- Install Python >=3.7 required to build OSPD. We choose to install Python 3.7.9 in this demo
wget https://www.python.org/ftp/python/3.7.9/Python-3.7.9.tgztar xzf Python-3.7.9.tgzcd Python-3.7.9./configure --enable-optimizationsmake altinstallcd ~
- Configure SELinux
In this blog, we have set up SELinux to run in permissive mode. I don’t recommend this, though. But i couldn’t deal with various permissions!
setenforce 0
sed -i 's/=enforcing/=permissive/' /etc/selinux/config
- Install Yarn
In order to install Yarn, you need to have NPM installed. Install latest Nodejs Package Manager on Rocky Linux. Nodejs 16.x is the current stable release based on the releases page
curl -sL https://rpm.nodesource.com/setup_16.x | sudo -E bash -yum install nodejs
curl -sL https://dl.yarnpkg.com/rpm/yarn.repo | sudo tee /etc/yum.repos.d/yarn.repo
yum install yarn
- Install PostgreSQL
yum install postgresql-server postgresql-contrib postgresql-server-devel/usr/bin/postgresql-setup --initdbsystemctl enable --now postgresql
- Once the installation is done, create the PostgreSQL user and database for Greenbone Vulnerability Management Daemon (gvmd).
Note that the database and user should be created as PostgreSQL user, postgres.
sudo -Hiu postgrescreateuser gvmcreatedb -O gvm gvmd
- Grant PostgreSQL User DBA Roles
psql gvmdcreate role dba with superuser noinherit;grant dba to gvm;\qexit
- Once that is done, restart PostgreSQL
systemctl restart postgresql
- Create a symbolic link
ln -s /usr/include /usr/include/postgresql
User Creation
echo "gvm ALL = NOPASSWD: $(which make) install" > /etc/sudoers.d/gvm
Building GVM 21.04 from Source
There are different tools required to install and setup GVM 21.04 on Redhat Linux 8. These include;
- GVM Libraries
- OpenVAS Scanner
- OSPd
- ospd-openvas
- Greenbone Vulnerability Manager
- Greenbone Security Assistant
- Python-GVM
- GVM-Tools
- OpenVAS SMB
Every component has README.md and a INSTALL.md file that explains how to build and install it.
Since we are running GVM as non-privileged user, gvm, then we will install all the GVM configuration files and libraries under, /opt/gvm.
Update the PATH environment variable on /etc/environment, to include the GVM binary path such that it looks like;
source /etc/environment
Add GVM library path to /etc/ld.so.conf.d.
echo "/opt/gvm/lib" > /etc/ld.so.conf.d/gvm.conf
Download GVM 21.04 Source Files
mkdir gvm-source
cd gvm-source
Navigate to gvm-source directory created above and run the subsequent commands to clone the GVM github branch files.
git clone -b main https://github.com/greenbone/openvas-smb.git
git clone -b stable https://github.com/greenbone/openvas.git
git clone -b stable https://github.com/greenbone/ospd.git
git clone -b stable https://github.com/greenbone/ospd-openvas.git
git clone -b stable https://github.com/greenbone/gvmd.git
git clone -b stable https://github.com/greenbone/gsa.git

Note that we will install all GVM 21.04 files and libraries to a non-standard location, /opt/gvm.
As such, you need to set the PKG_CONFIG_PATH environment variable to the location of your pkg-config files before running the installation.
Pay attention to the export command.
Be sure to replace the path, /opt/gvm, accordingly.
Build and Install GVM 11 Libraries
From within the source directory, /opt/gvm/gvm-source, in this setup, change to GVM libraries directory;
mkdir build && cd build
export PKG_CONFIG_PATH=/opt/gvm/lib/pkgconfig:$PKG_CONFIG_PATH
cmake .. -DCMAKE_INSTALL_PREFIX=/opt/gvm
make
sudo make install
Build and Install OpenVAS scanner and OpenVAS SMB
Open Vulnerability Assessment Scanner (OpenVAS) is a full-featured scan engine that executes a continuously updated and extended feed of Network Vulnerability Tests (NVTs). OpenVAS SMB provides modules for the OpenVAS Scanner to interface with Microsoft Windows Systems through the Windows Management Instrumentation API and a winexe binary to execute processes remotely on that system. Build and install openvas-smb
mkdir build && cd build
export PKG_CONFIG_PATH=/opt/gvm/lib/pkgconfig:/opt/heimdal/lib/pkgconfig:$PKG_CONFIG_PATH
cmake .. -DCMAKE_INSTALL_PREFIX=/opt/gvm
make
sudo make install
Build and install OpenVAS scanner
mkdir build && cd build
cmake .. -DCMAKE_INSTALL_PREFIX=/opt/gvm
make
sudo make install
Configuring OpenVAS Scanner
The host scan information is stored temporarily on Redis server. The default configuration of Redis server is /etc/redis/redis.conf. Switch back to privileged user and proceed.
exit
To begin run the command below to create the cache to the installed shared libraries.
ldconfig
Next, copy OpenVAS scanner Redis configuration file, redis-openvas.conf, to the same Redis configuration file.
mv /etc/redis.conf{,.original}
cp /opt/gvm/gvm-source/openvas/config/redis-openvas.conf /etc/redis.conf
Update the ownership of the configuration.
chown redis: /etc/redis.conf
Update the path to Redis unix socket on the /etc/redis.conf.
sed -i 's#/run/redis-openvas/redis.sock#/tmp/redis.sock#' /etc/redis.conf
Similarly, specify the path to Redis socket file on the /etc/openvas/openvas.conf configuration file using the db_address parameter as follows.
echo "db_address = /tmp/redis.sock" > /etc/openvas/openvas.conf
chown gvm: /etc/openvas/openvas.conf
Add gvm user to redis group;
usermod -aG redis gvm
You can also optimize Redis server itself improve the performance by making the following adjustments;
Increase the value of somaxconn in order to avoid slow clients connections issues.
echo "net.core.somaxconn = 1024" >> /etc/sysctl.conf
Redis background save may fail under low memory condition. To avoid this, enable memory overcommit (man 5 proc).
echo 'vm.overcommit_memory = 1' >> /etc/sysctl.conf
Reload sysctl variables created above.
sysctl -p
To avoid creation of latencies and memory usage issues with Redis, disable Linux Kernel’s support for Transparent Huge Pages (THP). To easily work around this, create a systemd service unit for this purpose.
[Unit]
Description=Disable Kernel Support for Transparent Huge Pages (THP)
[Service]
Type=simple
ExecStart=/bin/sh -c "echo 'never' > /sys/kernel/mm/transparent_hugepage/enabled && echo 'never' > /sys/kernel/mm/transparent_hugepage/defrag"
[Install]
WantedBy=multi-user.target
EOL
Reload systemd configurations
systemctl daemon-reload
Start and enable this service to run on system boot.
systemctl enable --now disable_thp
Start and enable Redis to run on system boot;
systemctl enable --now redis
A number of Network Vulnerability Tests (NVTs) require root privileges to perform certain operations. Since openvas is launched from an ospd-openvas process, via sudo, add the line below to sudoers file to ensure that the gvm user used in this demo can run the openvas with elevated rights using passwordless sudo.
echo "gvm ALL = NOPASSWD: /opt/gvm/sbin/openvas" >> /etc/sudoers.d/gvm
Also, update the secure_path to include the GVM /sbin paths, /opt/gvm/sbin.
sed -i.bak '/secure_path/ s|$|:/opt/gvm/sbin|' /etc/sudoers
Update NVTs
Update Network Vulnerability Tests feed from Greenbone Security Feed/Community Feed using the greenbone-nvt-sync command.
The greenbone-nvt-sync command must not be executed as privileged user root, hence switch back to GVM user we created above and update the NVTs.
Ensure that user can write to OpenVAS libraries directory, /var/lib/openvas/, directory.
su - gvm
Next, update the NVTs as openvas user;
greenbone-nvt-sync
Once the update is done, you need to update Redis server with the same VT info from VT files;
sudo openvas --update-vt-info
Build and Install Greenbone Vulnerability Manager
cd /opt/gvm-source/gvmd
mkdir build && cd build
cmake .. -DCMAKE_INSTALL_PREFIX=/opt/gvm
make
sudo make install
Build and Install Greenbone Security Assistant
cd /opt/gvm-source/gsa
mkdir build && cd build
cmake .. -DCMAKE_INSTALL_PREFIX=/opt/gvm
make
sudo make install
Exit the gvm user
exit
Enable gvm user to run GSA web application daemon, gsad, with passwordless sudo.
echo "gvm ALL = NOPASSWD: /opt/gvm/sbin/gsad" >> /etc/sudoers.d/gvm
Keeping the feeds up-to-date
The gvmd Data, SCAP and CERT Feeds should be kept up-to-date by calling the greenbone-feed-sync script regularly (e.g. via a cron entry):
sudo -Hiu gvm greenbone-feed-sync --type GVMD_DATA
sudo -Hiu gvm greenbone-feed-sync --type SCAP
sudo -Hiu gvm greenbone-feed-sync --type CERT
Please note: The CERT feed sync depends on data provided by the SCAP feed and should be called after syncing the later.
Consider setting cron jobs to run the nvts, cert and scap data update scripts at your preferred frequency to pull updates from the feed servers.
Next, run the command below to generate certificates gvmd. Server certificates are used for authentication while client certificates are primarily used for authorization. More on man gvm-manage-certs.
chown -R gvm: /opt/gvm/ /var/lib/gvm
Build and Install OSPd and OSPd-OpenVAS
Open Scanner Protocol (OSP) creates a unified interface for different security scanners and makes their control flow and scan results consistently available under the central Greenbone Vulnerability Manager service.
export PKG_CONFIG_PATH=/opt/gvm/lib/pkgconfig:$PKG_CONFIG_PATH
Based on the current version of Python installed, set the PYTHONPATH. We use Python 3.7 in this demo.
mkdir -p /opt/gvm/lib/python3.7/site-packages
Build OSPD
python3.7 setup.py install --prefix=/opt/gvm
Build OSPD-OpenVAS
python3.7 setup.py install --prefix=/opt/gvm
Running OpenVAS Scanner, GSA and GVM services
In order to make the management of OpenVAS scanner, GSA (WebUI service) and GVM daemon, create systemd service unit files for each of them as follows.
Log out as gvm user and execute the commands below as a privileged user.
sudo chown -R gvm: /opt/gvm/
cat > /etc/systemd/system/ospd-openvas.service << 'EOL'
[Unit]
Description=Description=OSPd Wrapper for the OpenVAS Scanner (ospd-openvas)
After=redis.service
After=postgresql.service
[Service]
ExecStartPre=-rm -rf /run/gvm/ospd-openvas.pid /run/gvm/ospd-openvas.sock
Type=simple
User=gvm
Group=gvm
RuntimeDirectory=gvm
Environment=PATH=/usr/local/sbin:/usr/local/bin:/usr/sbin:/usr/bin:/sbin:/bin:/usr/games:/usr/local/games:/opt/gvm/bin:/opt/gvm/sbin
Environment=PYTHONPATH=/opt/gvm/lib/python3.7/site-packages
ExecStart=/opt/gvm/bin/ospd-openvas \
--pid-file /run/gvm/ospd-openvas.pid \
--log-file /var/log/gvm/ospd-openvas.log \
--lock-file-dir /run/gvm/ -u /run/gvm/ospd-openvas.sock
RemainAfterExit=yes
[Install]
WantedBy=multi-user.target
EOL
chown -R gvm: /run/gvm /var/log/gvm
Reload systemd service unit configurations.
systemctl start ospd-openvas
Check the status of the service
systemctl status ospd-openvas

Check the logs;
tail -f /var/log/gvm/ospd-openvas.log
Enable OpenVAS scanner to run on system boot
systemctl enable ospd-openvas
Create GVMD Systemd Service files
cp /lib/systemd/system/gvmd.service{,.bak}


Create GVM Scanner
Since we launched the scanner and set it to use our non-standard scanner host path (/run/gvm/ospd-openvas.sock), we need to create and register our scanner;
sudo -Hiu gvm gvmd --create-scanner="ViduTech OpenVAS Scanner" --scanner-type="OpenVAS" --scanner-host=/run/gvm/ospd-openvas.sock
Next, you need to verify your scanner. For this, you first need to get the scanner identifier;
sudo -Hiu gvm gvmd --get-scanners

Based on the output above, our scanner UUID is, 09f20626-f515-40d2-bb32-e70cc04b9e45.
Verify the scanner
sudo -Hiu gvm gvmd --verify-scanner=09f20626-f515-40d2-bb32-e70cc04b9e45
Command output

Create OpenVAS (GVM) Admin User
Create OpenVAS administrative user by running the command below;
sudo -Hiu gvm gvmd --create-user admin --password=password@123
An administrator user can later create further users or administrators via clients like the Greenbone Security Assistant (GSA).
Set the Feed Import Owner
According to gvmd/INSTALL.md, certain resources that were previously part of the gvmd source code are now shipped via the feed. An example is the config “Full and Fast”.
gvmd will only create these resources if a “Feed Import Owner” is configured:
sudo -Hiu gvm gvmd --modify-setting 78eceaec-3385-11ea-b237-28d24461215b --value <uuid_of_user>
The UUIDs of all created users can be found using
sudo -Hiu gvm gvmd --get-users --verbose

Then Modify the gvmd settings with the user UUID.
sudo -Hiu gvm gvmd --modify-setting 78eceaec-3385-11ea-b237-28d24461215b --value dcb71e02-44ef-47a8-8b74-3e277c0017a7
GVM Log Files
Various Log files are located under the /opt/gvm/var/log/gvm directory.
gsad.log
gvmd.log
openvas.log
ospd-openvas.log
Accessing GVM 21.04 (OpenVAS)
firewall-cmd --reload
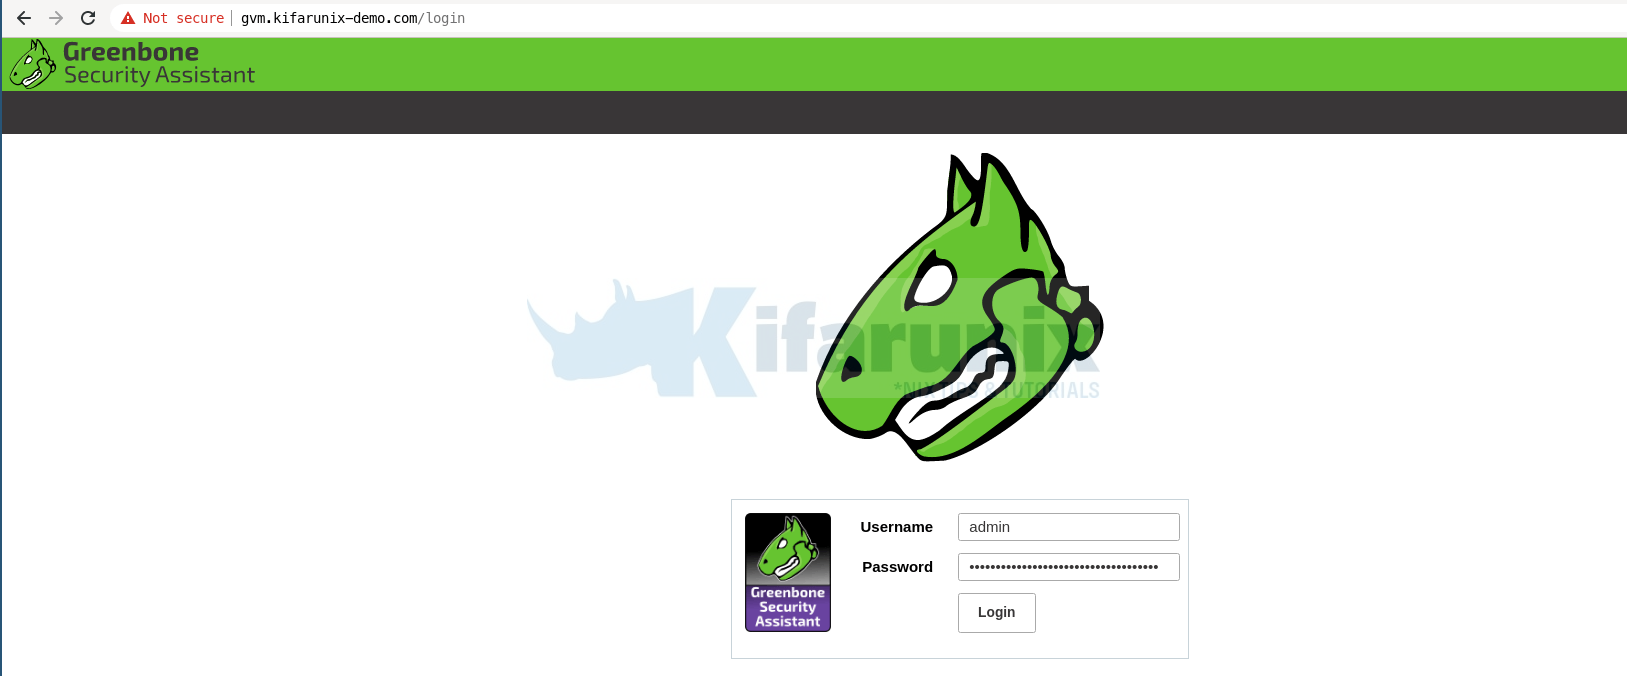
You can now access GSA via the url https:<serverIP-OR-hostname>. Accept the self-signed SSL warning and proceed.

No comments:
Post a Comment