Thursday, November 5, 2020

NGINX with Letsencrypt


NGINX with Letsencrypt


Let's Encrypt is a non-profit certificate authority run by Internet Security Research Group (ISRG) that provides X.509 certificates for Transport Layer Security (TLS) encryption at no charge. It launched on April 12, 2016.


Let's Encrypt certificates are valid for 90 days, during which renewal can take place at any time. The offer is accompanied by an automated process designed to overcome manual creation, validation, signing, installation, and renewal of certificates for secure websites. The project claims its goal is to make encrypted connections to World Wide Web servers ubiquitous.[6] By eliminating payment, web server configuration, validation email management and certificate renewal tasks, it is meant to significantly lower the complexity of setting up and maintaining TLS encryption.[1]

[1] Wikipedia

Prerequisite

  • Linux server with nginx installed (Port 80 and 443 should open for public)
  • There should be a DNS entry for your site.
  • "git" "wget" packages should install in your server.

In this example I am using CentOS 8

Step 01: Install Prerequisite

Install git and wget

yum install git wget


Step 02: Install NGINX

Download the nginx RPM from nginx official site base on your operation system and install.

NGINX Official Site: https://nginx.org/packages/


Install the nginx RPM

rpm -ivh nginx-1.18.0-2.el8.ngx.x86_64.rpm


Enable the nginx service and start

systemctl enable nginx
systemctl start nginx


Now try to access your site using host name. 

Step 03: Install letsencrypt

Clone the "letsencrypt" from GitHub

git clone https://github.com/letsencrypt/letsencrypt


Go inside the letsencrypt folder and execute this command.

./letsencrypt-auto certonly --webroot --webroot-path /usr/share/nginx/html/ --email <your-email-address> -d <your-site-name>


This will take some time to do the installation. 
Finally you will get a output like this.


Step 04: Configure NGINX for HTTPS

Got to nginx configuration folder "/etc/nginx/conf.d"


Create a new .conf file and add below content.

server {
    listen 443 ssl;
    server_name <Your-Site-Name>;

    ssl_certificate             /etc/letsencrypt/live/<Your-Site-Name>/fullchain.pem;
    ssl_certificate_key         /etc/letsencrypt/live/<Your-Site-Name>/privkey.pem;

    ssl_session_cache shared:SSL:10m;
    ssl_session_timeout  5m;

    ssl_protocols   TLSv1.2;
    ssl_ciphers  ECDH+AESGCM:DH+AESGCM:ECDH+AES256:DH+AES256:ECDH+AES128:DH+AES:RSA+AESGCM:RSA+AES:!aNULL:!eNULL:!MD5:!DSS;
    ssl_prefer_server_ciphers   on;

    # HSTS
    add_header Strict-Transport-Security "max-age=31536000; includeSubDomains" always;

    access_log /var/log/nginx/<Your-Site-Name>-access main;
    error_log  /var/log/nginx/<Your-Site-Name>-error warn;

    location / {
        root /usr/share/nginx/html;
    }

    location /.well-known/acme-challenge/ {
        root   /usr/share/nginx/html;
    }
}

server {
    listen 80;
    server_name <Your-Site-Name>;
    rewrite     ^ https://<Your-Site-Name>$request_uri? permanent;
}

Include new .conf file to nginx.conf 


Now check the nginx config test by typing below command.

nginx -t


Now restart the nginx service


Now browse your site with https and check whether you are getting "letsencrypt" certificate.


Check your site with sslshopper and ssllabs to verify it further.


Since letsencrypt certificate only valid for 3 month we have to put schedule job to renew. You can add these two lines to crontab.

00 00 * * * /root/letsencrypt/certbot-auto renew
00 01 * * * /bin/systemctl reload nginx

Monday, November 2, 2020

Docker Swarm With Multi Master


Please go through the "Docker Swarm Single Master" configuration if you are new to this concept.

URL: https://sltechgeekx.blogspot.com/2020/07/docker-swarm.html

Docker Swarm With Multi-Master 

If the swarm loses the quorum of managers, the swarm cannot perform management tasks. If your swarm has multiple managers, always have more than two. To maintain quorum, a majority of managers must be available. An odd number of managers is recommended, because the next even number does not make the quorum easier to keep. For instance, whether you have 3 or 4 managers, you can still only lose 1 manager and maintain the quorum. If you have 5 or 6 managers, you can still only lose two.

Even if a swarm loses the quorum of managers, swarm tasks on existing worker nodes continue to run. However, swarm nodes cannot be added, updated, or removed, and new or existing tasks cannot be started, stopped, moved, or updated.

You should maintain an odd number of managers in the swarm to support manager node failures.


Configurations

In this example we need 5 servers.

Manager Node --> 3
Worker Node --> 2

Manager-1 --> 192.168.1.131
Manager-2 --> 192.168.1.132
Manager-3 --> 192.168.1.133

Worker-1 --> 192.168.1.134
Worker-2 --> 192.168.1.135

Step 1

Install and enable docker service in each servers

yum install docker-ce docker-ce-cli containerd.io

systemctl enable docker
systemctl start docker

Step 2

Configure docker swarm in manager-1 node

docker swarm init --advertise-addr 192.168.1.131


Step 3

Add Worker Node to docker swarm. You will get join token for worker nodes from above command.

docker swarm join --token SWMTKN-1-17drizdszlt8ftwnw4nzafrmv9h0cjp9f53dcwm10kk52baulp-44vv9fwo8upmoba3j1vxcruro 192.168.1.131:2377

Step 4

Add Manager Nodes to docker swarm
Execute below command to generate manager token

docker swarm join-token manager


Execute the join token in each manager nodes.

docker swarm join --token SWMTKN-1-17drizdszlt8ftwnw4nzafrmv9h0cjp9f53dcwm10kk52baulp-bvfss1vww7caykf6tfk23ijg9 192.168.1.131:2377

To verify the docker nodes execute below command.

docker node ls


Step 5

Create Docker Service

Here I am using nginx docker image to create docker image. Initially I am creating five docker-nginx containers and expose port 80 and 443 for out side. Also I am limit the memory and CPU for each containers.

docker service create --limit-cpu 1 --limit-memory 500MB --replicas 5 -p 80:80 -p 443:443 --hostname=docker-nginx.local --name docker-nginx nginx

To verify the docker service 

docker service ls


You can type manager IP to load the webserver default page.

http://192.168.1.131/

Checking high availability of the Docker Swarm

As pet the below image, we have 3 manager nodes and "Leader" is manager-1. 


Now we are going to shutdown the manager-1 node. 
After Shutdown the manager-1, you can verify docker swarm node status by executing below command.


Now our new leader is manager-2

Saturday, October 31, 2020

Docker Swarm With Single Master

What is swarm?

Docker With Spring Boot and MySQL: Docker Swarm Part 3 - DZone ...

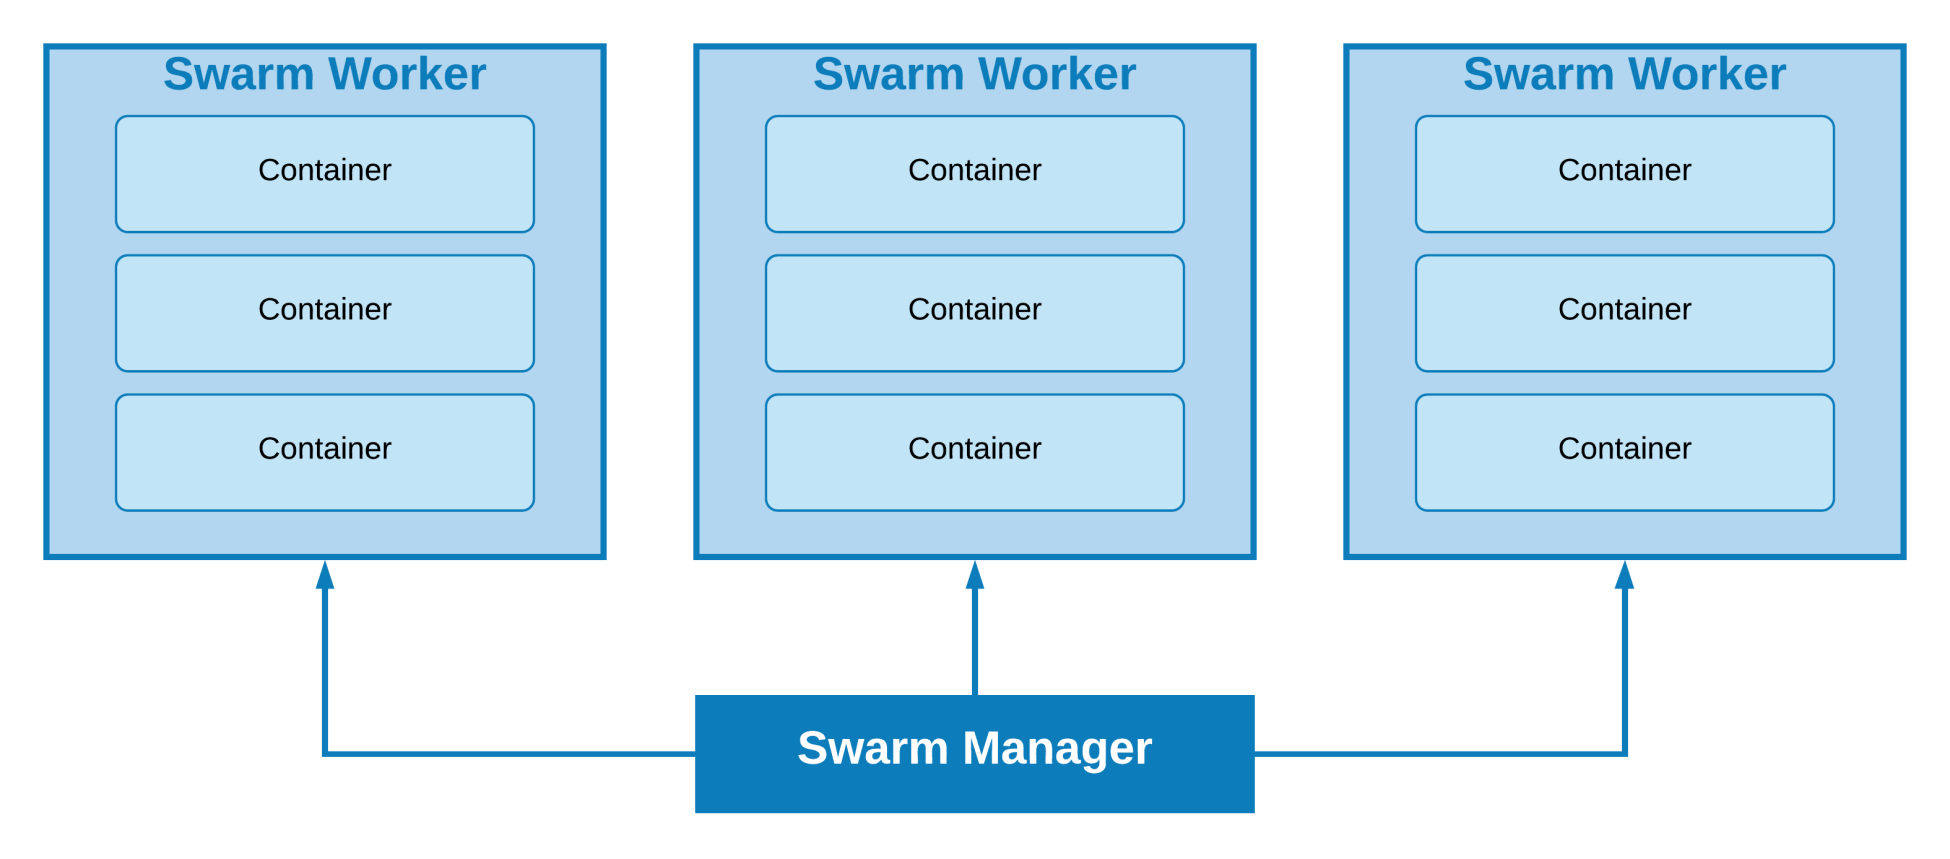
Docker swarm is the concept which is use to do cluster management in dcockr. swarm contain multiple docker host know as nodes. Node can be a manager or worker.

Manager --> Manage swarm services 
Worker --> Fasilitate to run swarm services

How to configure docker swarm?

We need to have 3 servers

1--Master Node
2--Worker Node

Master --> 192.168.1.131
Worker-1 --> 192.168.1.132
Worker-2 --> 192.168.1.133

Step 1

Install and enable docker service in each servers

yum install docker-ce docker-ce-cli containerd.io

systemctl enable docker
systemctl start docker

Step 2

Configure docker swarm in manager node

docker swarm init --advertise-addr 192.168.1.131

Step 3

Add Worker Node to docker swarm. You will get join token for worker nodes from above command.

docker swarm join --token SWMTKN-1-4756c3muztsup58wb0hc8ewwturxwmp3s40gbmx3ts9m5dmbwr-dpt2duvjtsayw9w3l73q49r1e 192.168.1.131:2377

To verify the docker nodes

docker node ls

Step 4

Create Docker Service

Here I am using nginx docker image to create docker image. Initially I am creating three docker-nginx containers and expose port 80 and 443 for out side.

docker service create --replicas 3 -p 80:80 -p 443:443 --hostname=docker-nginx.local --name docker-nginx nginx

To verify the docker service 

docker service ls


Scale the service

docker service scale vqnerzh63o45=4


You can type manager IP to load the webserver default page.

http://192.168.1.131/


Monday, October 26, 2020

Zabbix Custom Email Alert


Zabbix Custom Email Alert

Features

  • Graphs based on latest data are sent to your Email
  • You can send messages both in private and group email
  • Links to open Graph URL and Event URL.

Configuration / Installation

Zabbix server need to be install, configure and up and running.
  • Put problem.sh, resolved.sh, acknowledged.sh and sendEmail in your AlertScriptsPath directory, the path is set inside your zabbix_server.conf

Script should be execute by zabbix user. Default path of the "alertScriptPath is 

Download all the scripts from Github.  Download Link

  • Set below parameters in problem.sh, resolved.sh, acknowledged.sh files
SENDER="Zabbix-Alert<zabbix-alert@mycompany.com>"
ZBX_URL="https://mycompany.com/zabbix"
USERNAME="Admin" # Zabbix Username
PASSWORD="password" # Zabbix Password

Note: Better to use read only user instead of using admin user.

  • Configure email server details in "sendEmail" client.
  • Add 3 new media as "Zabbix Problem Email" , " Zabbix Resolved Email" and "Zabbix Acknowledged Email" in Zabbix web interface with these settings:


  • Create an Action for Email Alert
Add host groups to condition list.


  • Under Operation Tab, Put default subject and default message like this.

Default Subject:  

[{TRIGGER.SEVERITY}] : {TRIGGER.NAME}

Default Message: 

Problem started at {EVENT.TIME} on {EVENT.DATE}
Problem name: {TRIGGER.NAME}
Host: {HOST.NAME}
IP: {HOST.IP}
Severity: {TRIGGER.SEVERITY}

Original Problem ID: {EVENT.ID}
Status:  {EVENT.STATUS}
Trigger ID: {TRIGGER.ID}
Last Value: {ITEM.LASTVALUE}
Item ID: {ITEM.ID}
Item Graphic: [{ITEM.ID1}]

  • Add operation details

  • Then add Recovery Operation 

Default Subject:  

[Resolved] : {TRIGGER.NAME}

Default Message: 

Problem has been resolved at {EVENT.RECOVERY.TIME} on {EVENT.RECOVERY.DATE}
Problem name: {TRIGGER.NAME}
Host: {HOST.NAME}
IP: {HOST.IP}
Severity: {TRIGGER.SEVERITY}

Original Problem ID: {EVENT.ID}
Status:  {EVENT.STATUS}
Trigger ID: {TRIGGER.ID}
Last Value: {ITEM.LASTVALUE}
Item ID: {ITEM.ID}
Item Graphic: [{ITEM.ID1}]

  • Add operation details Recovery

  • Then add Acknowledgement Operation 

Default Subject:  

[Acknowledged] : {TRIGGER.NAME}

Default Message: 

{USER.FULLNAME} user acknowledged problem at {ACK.DATE} {ACK.TIME} with the following message:
{ACK.MESSAGE}

Problem name: {TRIGGER.NAME}
Host: {HOST.NAME}
IP: {HOST.IP}
Severity: {TRIGGER.SEVERITY}
Status:  {EVENT.STATUS}
Original Problem ID: {EVENT.ID}
Last Value: {ITEM.LASTVALUE}

  • Add operation details for Acknowledgement

Sample Email Notifications

Problem Email


Recovery Email


Wednesday, October 21, 2020

NGINX RPM Build with Third-party Modules


Prerequisites

  • OS with Centos 7 installed.
  • Enable "epel-release" repo
  • Install below packages
    • openssl openssl-devel gcc gd-devel GeoIP GeoIP-devel libgdata-devel.x86_64 libgdata.x86_64 gcc-c++ flex bison yajl yajl-devel curl-devel curl GeoIP-devel doxygen zlib-devel gcc make automake autoconf libtool pcre pcre-devel libxml2 libxml2-devel curl curl-devel httpd-devel rpm-build.x86_64 rpm-build-libs.x86_64 redhat-lsb-core.x86_64 mhash.x86_64 mhash-devel.x86_64 patch.x86_64 luajit.x86_64 libmodsecurity.x86_64 dkms gcc make kernel-devel bzip2 binutils patch libgomp glibc-headers glibc-devel kernel-headers libXrandr libmodsecurity-devel.x86_64 git mlocate
  • Download and install nginx source RPM from nginx repo (http://nginx.org/packages/centos/7/SRPMS)


Pleased third-party module in side the "/root/rpmbuild/SOURCES/modules"


  • Modules we are going to include are as follow

Build ModSecurity

  • Download ModSecurity from above URL 
  • Execute below commands to build it.
./build.sh

./configure 

 make

make install  


Build LuaJIT

Download the LuaJIT from above URL. Then make the build and install.

make
make install 


Build NGINX with Modules

In some modules, its has patches to apply for nginx source code before build. You can check whether patches are include or not for that module by go through the each module folder. If you fine any patch file you have to patch it.

Ex: 

Apply Patches 

To apply patch you have to first extract the nginx source tar file. It is in "/root/rpmbuild/SOURCES".

Then execute this command

patch -p0 < /root/rpmbuild/SOURCES/modules/nginx-goodies-nginx-sticky/patches/cookies.patch

You have to put full path when it prompt for File path. You find the path from locate command.


Once you applied all the patches, create a tar.gz file of nginx source code. Backup old one before do it.


Then include module you want to build with nginx to nginx.spec file.


Now it is time build the nginx.
To build the nginx execute this command.

rpmbuild -bb nginx.spec


It will take some time to build the final RPM base on the number of modules you have added.
If you successfully completed the build you will get some thing like this at the end.

Note: If you are a beginner, add module by module and build.


Build RPM is locate under below location.


You can install the nginx now.


You can verify available modules by typing nginx -V command.